Schema diff tutorial
Step-by-step guide showing you how to compare two development branches using Schema Diff
In this guide we will create an initial schema on a new database called people on our main branch. We'll then create a development branch called dev/jordan, following our recommended convention for naming development branches. After making schema changes on dev/jordan, we'll use the Schema Diff tool on the Branches page to get a side-by-side, Github-style visual comparison between the dev/jordan development branch and main.
Before you start
To complete this tutorial, you'll need:
-
A Neon account. Sign up here.
-
To interact with your Neon database from the command line:
Step 1: Create the Initial Schema
First, create a new database called people on the main branch and add some sample data to it.
-
Create the database.
In the Neon Console, go to Databases → New Database. Make sure your
mainbranch is selected, then create the new database calledpeople. -
Add the schema.
Go to the SQL Editor, enter the following SQL statement and click Run to apply.
CREATE TABLE person (
    id SERIAL PRIMARY KEY,
    name TEXT NOT NULL,
    email TEXT UNIQUE NOT NULL
);
Step 2: Create a development branch
Create a new development branch off of main. This branch will be an exact, isolated copy of main.
For the purposes of this tutorial, name the branch dev/jordan, following our recommended convention of creating a long-lived development branch for each member of your team.
-
Create the development branch
On the Branches page, click Create Branch, making sure of the following:
- Select
mainas the default branch. - Name the branch
dev/jordan.
- Select
-
Verify the schema on your new branch
From the SQL Editor, use the meta-command
\d personto inspect the schema of thepersontable. Make sure that thepeopledatabase on the branchdev/jordanis selected.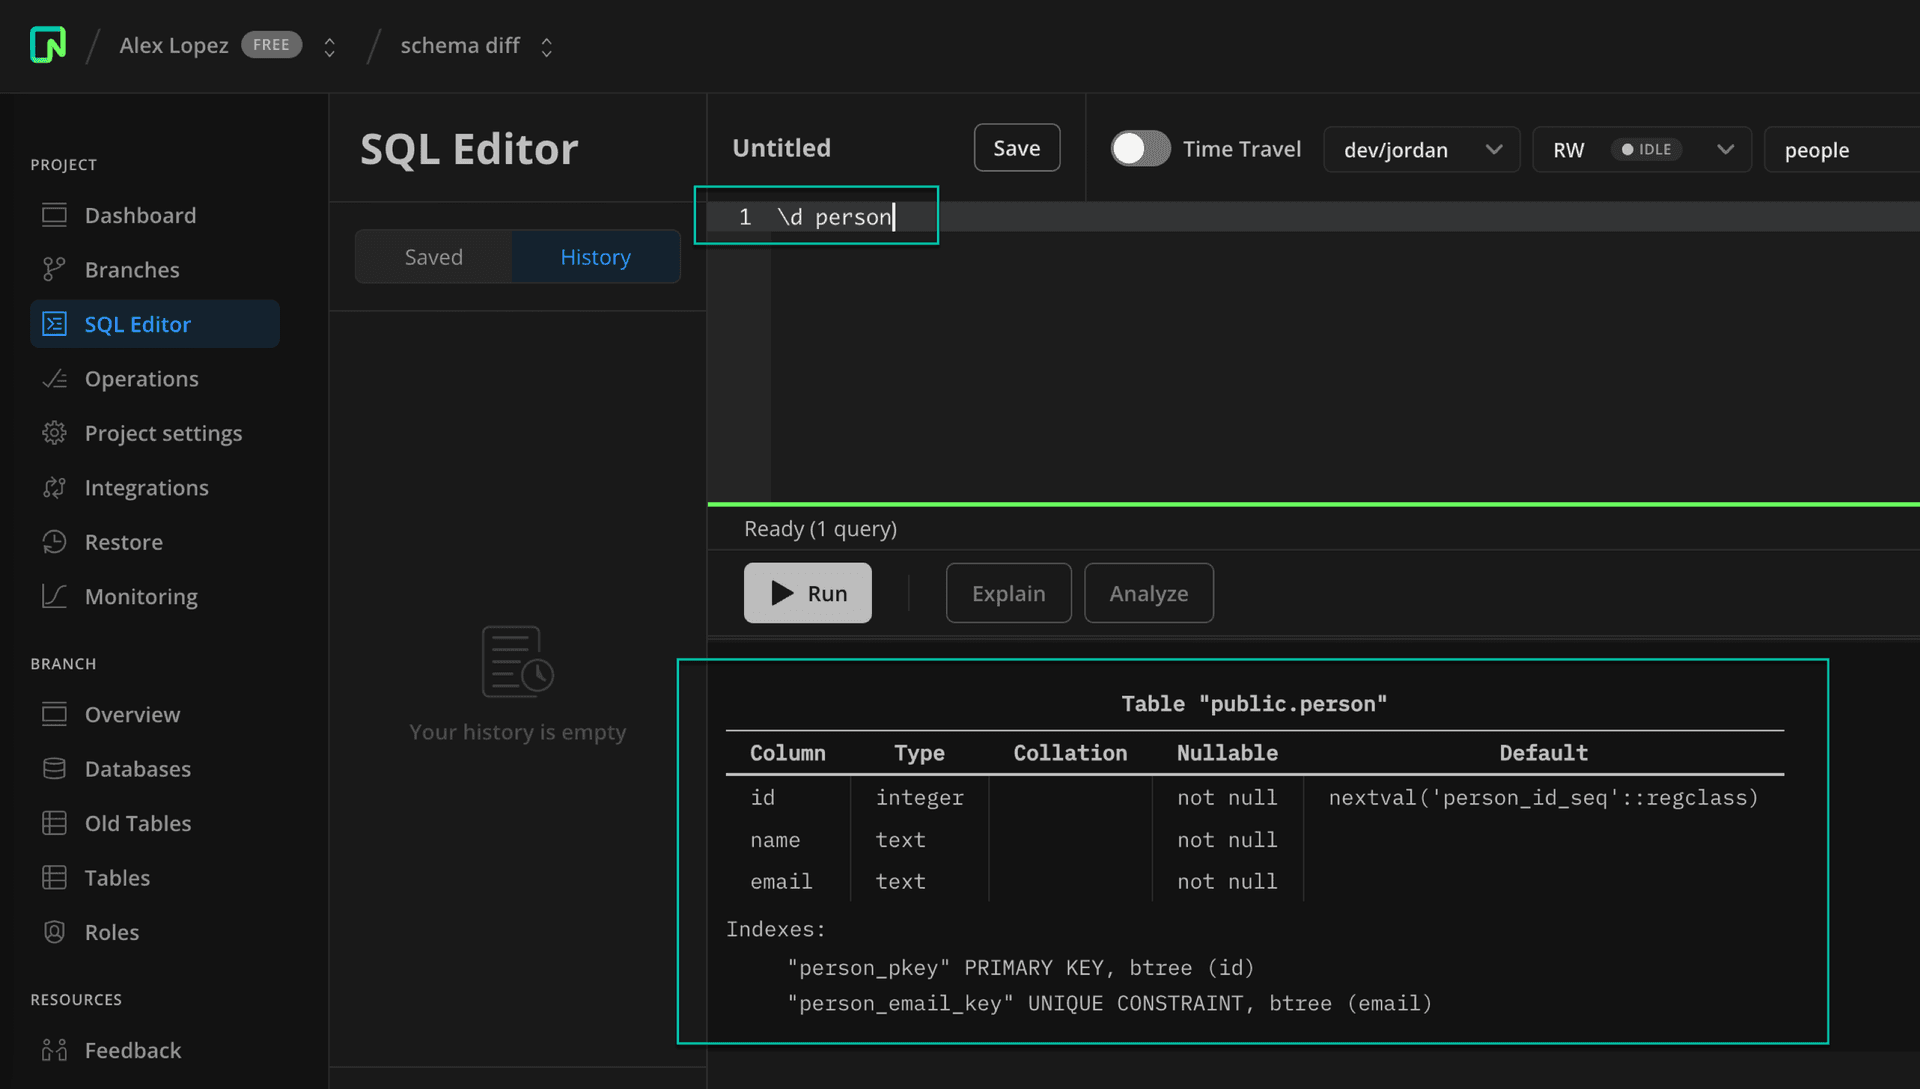
Step 3: Update schema on a dev branch
Let's introduce some differences between the two branches. Add a new table to store addresses on the dev/jordan branch.
In the SQL Editor, make sure you select dev/jordan as the branch and people as the database.
Enter this SQL statemenet to create a new address table.
CREATE TABLE address (
    id SERIAL PRIMARY KEY,
    person_id INTEGER NOT NULL,
    street TEXT NOT NULL,
    city TEXT NOT NULL,
    state TEXT NOT NULL,
    zip_code TEXT NOT NULL,
    FOREIGN KEY (person_id) REFERENCES person(id)
);
Step 4: View the schema differences
Now that you have some differences between your branches, you can view the schema differences.
-
Click on
dev/jordanto open the detailed view, then under Compare to Parent click Open schema diff.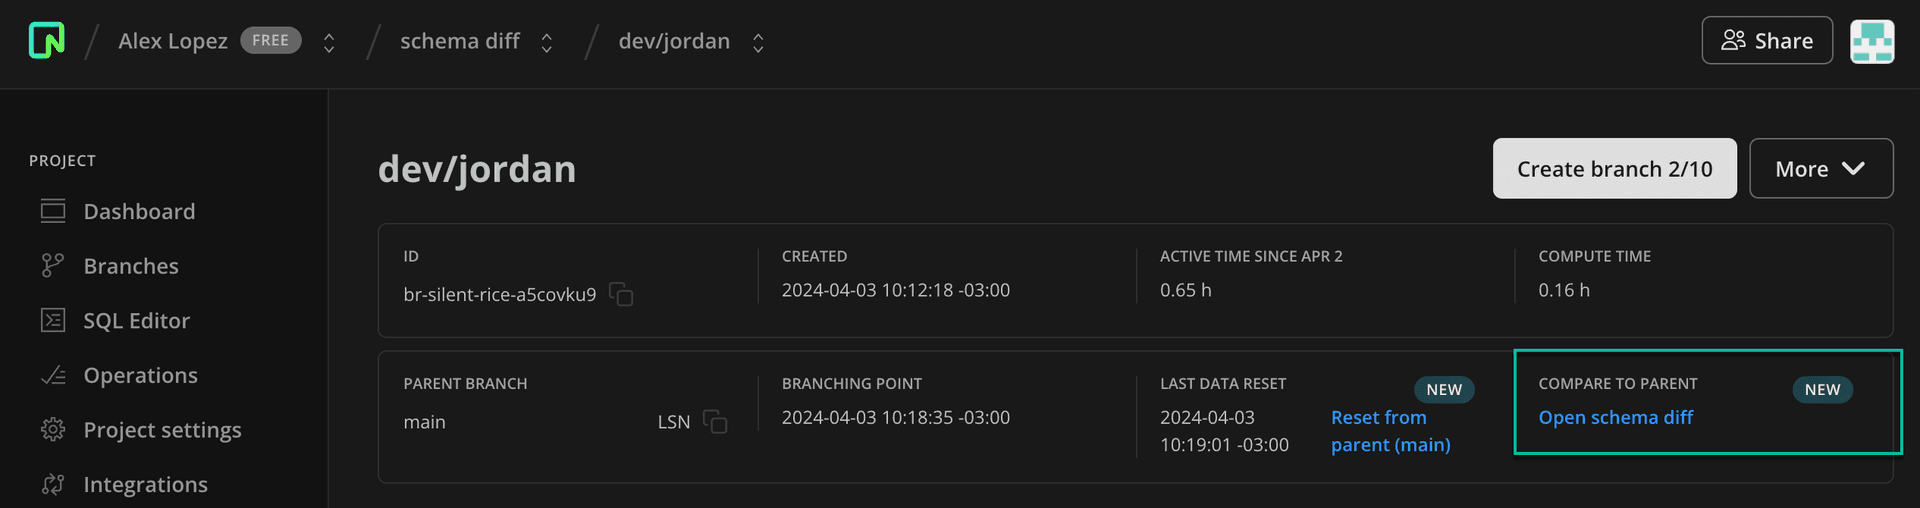
-
Make sure you select
peopleas the database and then click Compare.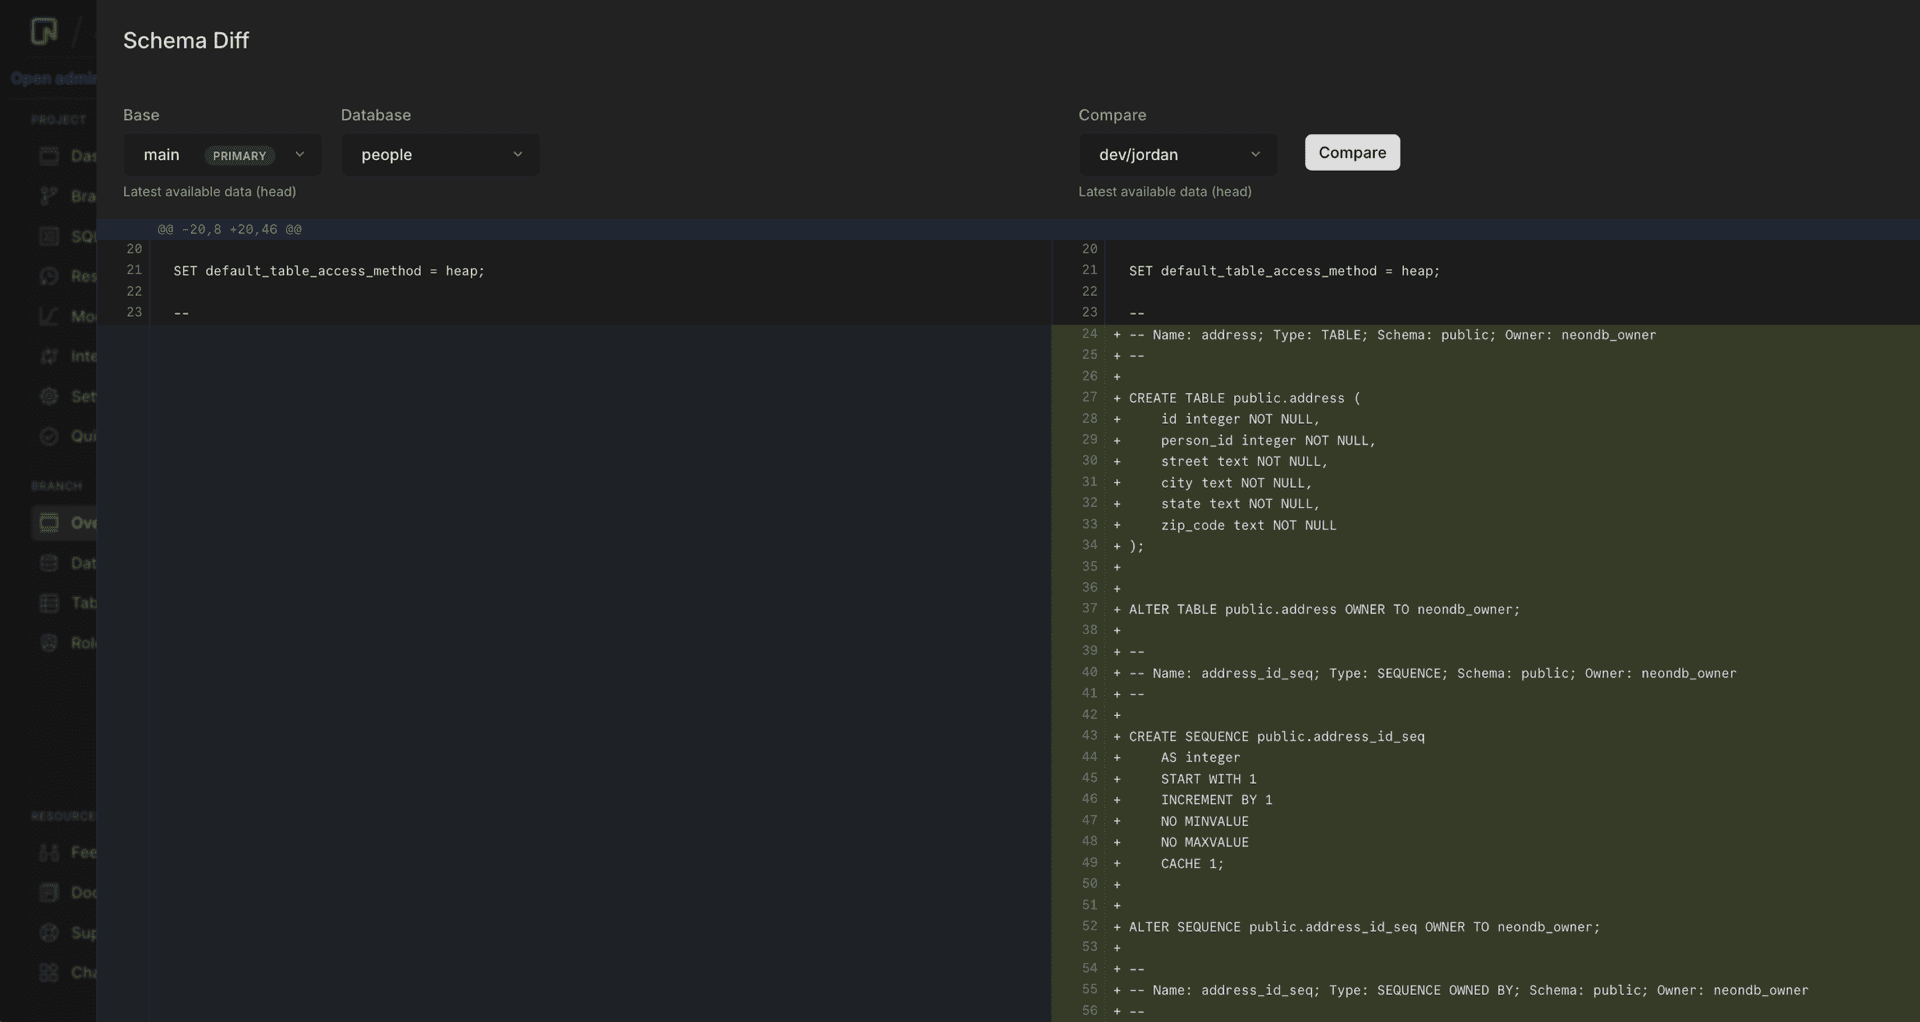
You will see the schema differences between dev/jordan and its parent main, including the new address table that we added to the dev/jordan branch.
You can also launch Schema Diff from the Restore page, usually as part of verifying schemas before you restore a branch to its own or another branch's history. See Branch restore for more info.